Sun is the most potent and important source of energy. Surya (also known as Aditya) is the Hindu god of the Sun. Surya is considered the creator of the universe and the source of all life. He is the supreme soul who brings light and warmth to the world. It is believed in the Hindu mythologies that each day he travels across the sky in his golden chariot pulled by seven horses and driven by red Aruna, a personification of Dawn.
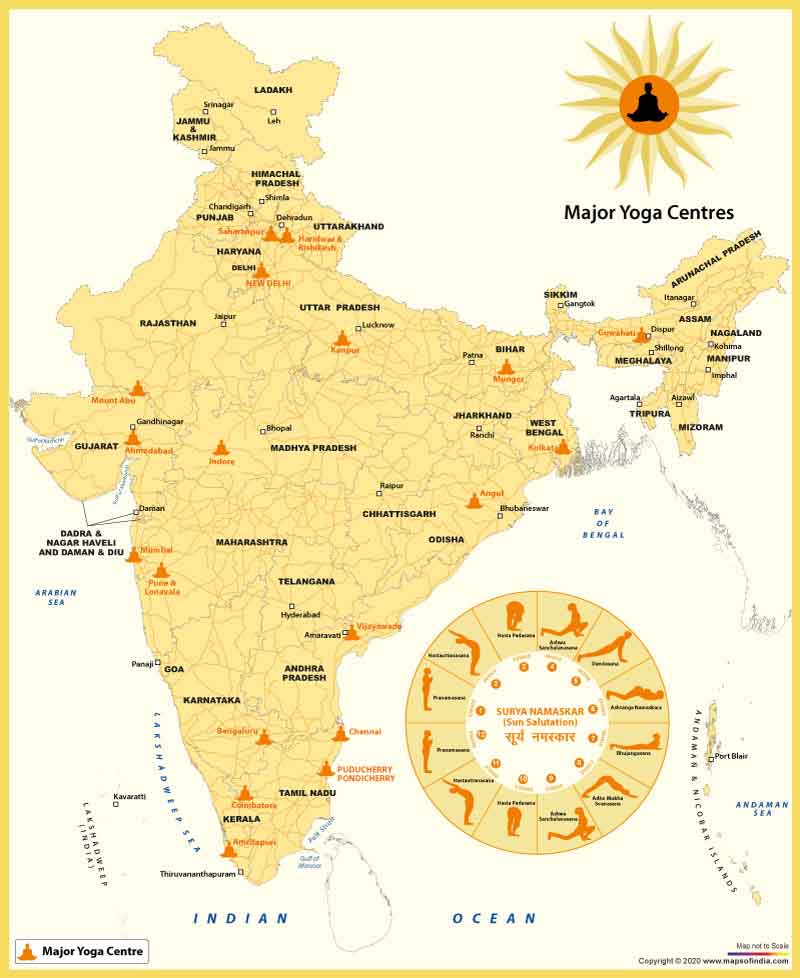
Surya Namaskar is a way in Hindu belief to express gratitude to the sun for sustaining life on this planet. Through Surya Namaskar or Sun Salutation, which is a sequence of 12 powerful yoga poses. This is a tested cardiovascular workout; Surya Namaskar is also known to have an immensely positive impact on the body and mind.
Surya Namaskar is best done early morning on an empty stomach. Each round of Sun Salutation consists of two sets, and each set is composed of 12 yoga poses.
Important benefits of Surya Namaskar:
- An excellent exercise for weight loss management
- Improves skin glow
- Helps maintain cardiovascular health
- Reduce the tension levels
- Improves overall health, strengthens the body and relaxes the mind
- Enhances cognitive functions
- Stimulates the nervous system
- Helps in stretching, flexing and toning the muscles
- Strengthens the immune system
The steps for Surya Namaskar are:
Step 1. Pranamasana (Prayer pose)
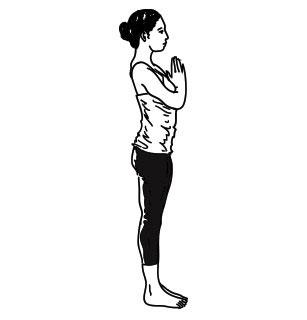
It’s the first position of the asan which is to stand at the edge of your mat (at the front part), keep your feet together and balance your weight equally on both the feet. Expand your chest and relax your shoulders along with the body.
Step 2. Hastauttanasana (Raised arms pose)
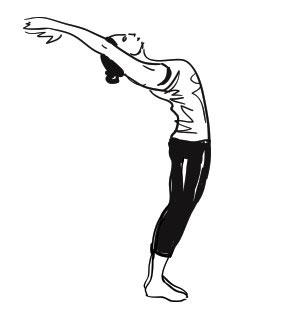
Breathing in, lift the arms up and back, keeping the biceps close to the ears. In this pose, the effort is to stretch the whole body up from the heels to the tips of the fingers. Keep your feet together. You may push the pelvis forward a little bit. Ensure you’re reaching up with the fingers rather than trying to bend backwards. This will give you more benefit.
Step 3. Hastapadasana (Standing forward bend)
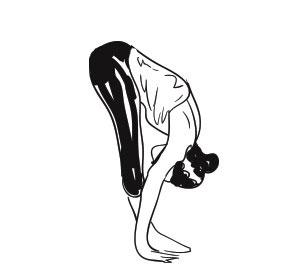
Breathing out, bend forward from the waist keeping the spine erect. As you exhale completely, bring the hands down to the floor beside the feet. Try to the best extent to touch the feet. At the early stage, you may not be able to touch the feet. Does not matter, stretch as much as you can.
You may bend the knees, if necessary, to bring the palms down to the floor. Now make a gentle effort to straighten the knees. It’s a good idea to keep the hands fixed in this position and not move them henceforth until we finish the sequence.
Step 4. Ashwa Sanchalanasana (Equestrian pose)
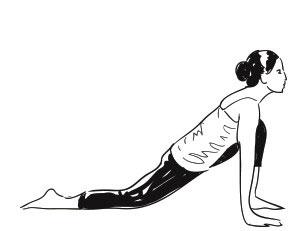
Breathing in, push your right leg back, as far back as possible. Bring the right knee to the floor and lookup. Ensure that the left foot is exactly in between the palms.
Step 5. Dandasana (Stick pose)
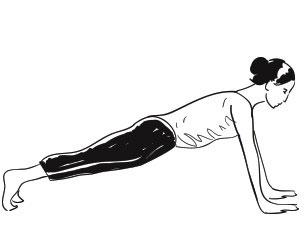
As you breathe in, take the left leg back and bring the whole body in a straight line.
Try to keep the arms perpendicular to the floor.
Step 6. Ashtanga Namaskara (Salute with eight parts or points)
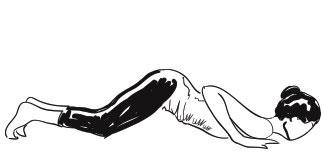
Gently bring your knees down to the floor and exhale. Take the hips back slightly, slide forward, rest your chest and chin on the floor. Raise your posterior a little bit. The two hands, two feet, two knees, chest and chin (eight parts of the body) should touch the floor.
Step 7. Bhujangasana (Cobra pose)
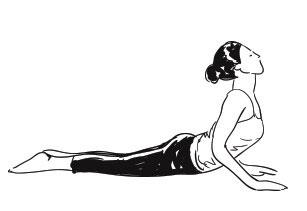
Slide forward and raise the chest up into the Cobra pose. You may keep your elbows bent in this pose with the shoulders away from the ears. Look up at the ceiling.
As you inhale, make a gentle effort to push the chest forward; as you exhale, make a gentle effort to push the navel down. Tuck the toes under. Ensure you’re stretching just as much as you can and not forcing your body.
Step 8. Adho Mukha Svanasana (Downward facing dog pose)
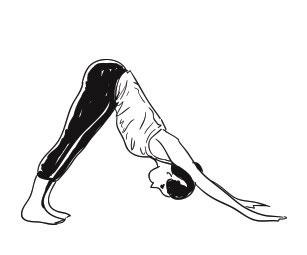
Breathing out, lift the hips and the tailbone to bring the body into an inverted ‘V’ pose.
If possible, try and keep the heels on the ground and make a gentle effort to lift the tailbone, going deeper into the stretch.
Step 9. Ashwa Sanchalanasana (Equestrian pose)

Breathing in, bring the right foot forward in between the two hands. The left knee goes down on the floor. Press the hips down and lookup.
Place the right foot exactly between the two hands and the right calf perpendicular to the floor. In this position, make a gentle effort to push the hips down towards the floor, to deepen the stretch.
Step 10. Hastapadasana (Standing forward bend)

Breathing out, bring the left foot forward. Keep the palms on the floor. You may bend the knees, if necessary.
Gently straighten the knees, and if you can, try and touch your nose to the knees. Keep breathing.
Step 11. Hastauttanasana (Raised arms pose)

Breathing in, roll the spine up. Raise the hands and bend backwards a little bit, pushing the hips slightly outward.
Ensure that your biceps are beside your ears. The idea is to stretch up more rather than stretching backwards.
Step 12. Tadasana (Mountain Pose)
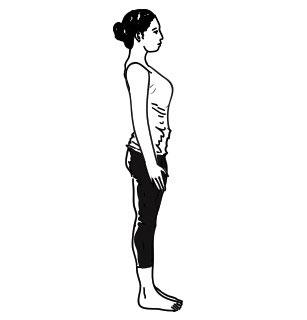
As you exhale, first straighten the body, then bring the arms down. Relax in this position and observe the sensations in your body.
This is one complete set of Surya Namaskar. Complete the round by repeating the steps. Only this time, start with taking the left foot behind in step number 4 and bringing the right foot forward in step number 10.
Do’s and Don’t of Surya Namaskar
1. Warm-up your body before doing Surya Namaskar with the help of Sukshma Kriyas.
2. Perform Surya Namaskar slowly at ease and try to hold every position for a while and feel it. Don’t do it too fast or too slow.
3. Focus on your breathing while performing every step. For example, breathe in while you are going back and breathe out while your spinal cord is bending forwards.
4. These days, various yoga centres treat it like an exercise and think that it is good to do it fast. Don’t fall in this trap. You should try to connect with it while doing.
5. The synchronization between your breath and poses is most important.
6. Don’t drink or eat anything before or after the Surya namaskar.
7. Try to do it facing the sun. This has its benefits.


